Saturday, July 31, 2010

STURMDIAS -4- Color XXX

I wasn't overly happy with the red color - it just didn't work well with the silver thrusters. So i did some color testing to find a better color for the armor.

left: Vallejo Orange
middle: Vallejo Yellow + a bit Orange
right: the old red


Went with the orange which looks pretty sick imo :D
(Sprayed a white basecoat first)

I'm gonna make the overall color scheme more similar to the Rick Dias than the all red Nagano Dias.

Thus my dark blue/gray armor parts. They are a mix of Tamiya Nato Black and Tamiya Blue.

The colors go pretty well together i think.

Friday, July 30, 2010

STURMDIAS -3.1- joints

Forgot to add this to the last post. I used Yellow Submarine/Hobby Base joints for the ankles and the hip. Aside from the shoulder/upper arm joints the others don't really make sense to replace. I'll leave the shoulder pinned static as well since the Dias will hold a pretty big and heavy gun which would be to heavy for the small joints i could use there. Also the gun allows for only one pose anyways.


The T01 set is a PERFECT fit for the kit (like for the Qubeley)

Thursday, July 29, 2010

STURMDIAS -3- more stuff

Hey! Made a bit progress with the Sturmdias. The last month I haven't really been working on it as the weather here was way too good and the World Cup was in progress :)

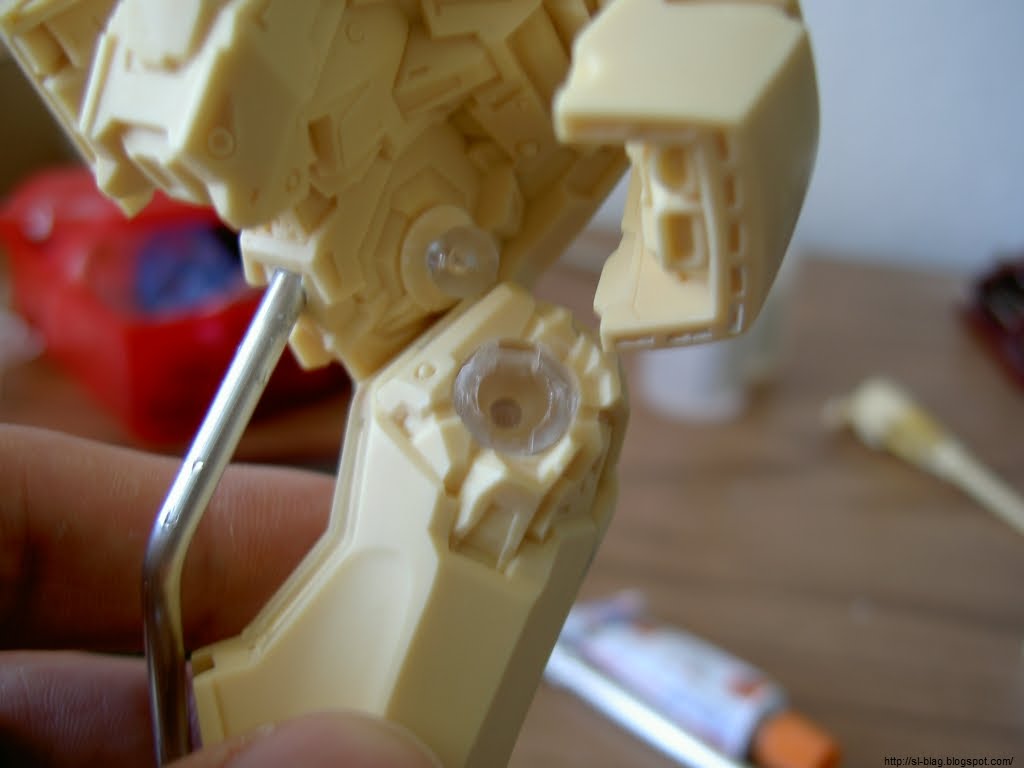
Pinned leg VS. AA battery:


Pre-mixed some primer to airbrush. 50% Mr Resin Primer, 50% Thinner and a dash Mr. Retarder so the paint dries a bit slower.


Here is the super lovely booster leg assembly. I used magnets to hold the boosters in place.

So they just snap in place, works great.

All the pieces together:


Color testing: Vallejo Italian Red (left) vs. Vallejo Scarlet Red (right).
Will go with Scarlet Red, it more vivid and has more of a pop... whatever that means :)

Next up: Those super-sweet thrusters <3

Some closeup with Tamiya Clear Red highlight.


After some coats of Tamiya Smoke, sumi-ire/washing with flat black and stone gray enamel, some decals, and a bit of roughing them up: Thrusters finished!


Well that's it for now, but I think/hope I will make better progress now :)

Friday, July 16, 2010

Plamo Tsukurou CUSTOM SP-15 on youtube

Episode SP-15 featuring a 1/24 Tamiya Fiat 500F mysteriously appeared on youtube.
Links are on the video page.

Friday, July 9, 2010

Ayukawa Madoka Maxfactory 1/7 Kit


A while ago i did my first figure kit. Ayukawa from my all-time favorite animu show Kimagure Orange Road :)
Got the kit from an ebay Thai caster - so i didn't expect much in casting quality, but it actually was quite decent.


The details in the cast were pretty good and the part fit was okay'ish. It was mainly the skirt that needed hot water rebending, an easy fix.
Where it got tricky was the consistency of the resin. It was REALLY hard and a bit brittle for the thin parts while at the same time it had a bit of a rubbery feel to it. Weird stuff. Also it smelled a bit like strawberry chewing gum.

All in all it was pretty workable thou.
I used neodym magnets for the head/hair connection, otherwise i used brass pins.


Here you can see some parts that broke of while i was sanding. Fixed it with MORI MORI putty, which worked excellent for this.


primer! & after a coat of white it was masking time


Parts painted minus the face:


First I tried to airbrush the eyes with some insane masking, but it didn't work out well so I went with handpainting. Used the scan of a close up cel of Madoka as a sample and painted with enamel and acrylic paint with a tiny 00000 brush. Worked pretty good actually and wasn't that hard.


flickr set with a few more pics here