Links to the SP-14 episode on youtube are now in the video section.
The episode has a Tamiya JGSDF Light Armored Vehicle and a Academy UH-60L Black Hawk.
Tuesday, March 30, 2010
Wednesday, March 24, 2010
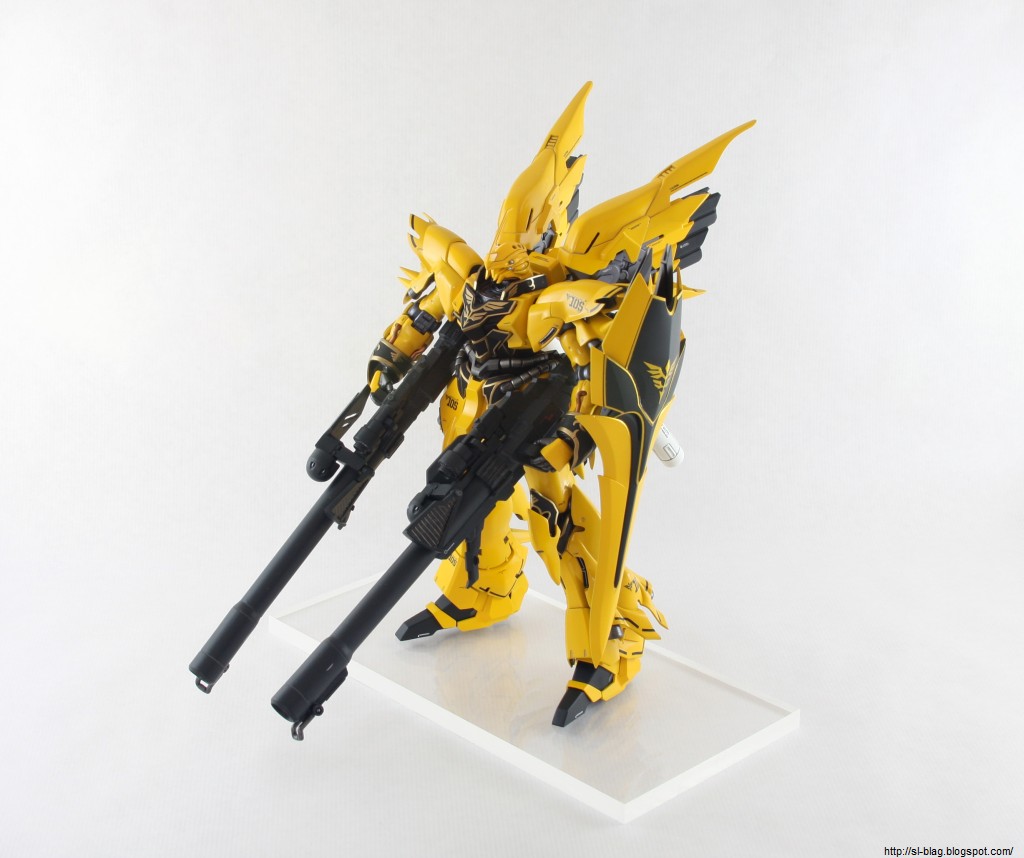
MG Sinanju + Neograde Option Parts - Finished!
The Sinanju is finished! It's totally yellow :D
With the bazookas it doesn't allow for much posing, but that's something i don't really care about anyways. I overexposed the pics a bit which seems like a popular thing to do on a white background. Turned out pretty good i think.


The "hanging" shield mechanism on the shoulder is pretty cool. Much prefer it over clipping it on the arm.
Paint used is:
Armor:
Mr Primer
Mr Base White
Tamiya Flat Yellow
Tamiya Clear
Awesome Mystery Hardwarestore Clearcoat for gloss finish.
Internal frame:
Mr Metal Color Iron (buffable)
Mr Metal Color Dark Iron (buffable)
Tamiya Gunmetal
Ornaments:
Revell Flat Black email
Alclad2 Pale Gold
Weapons:
Tamiya Flat Nato Black
+ various others for small stuff
A few more pics on my flickr:
http://www.flickr.com/photos/40088241@N03/sets/72157623559279459/
Tuesday, March 16, 2010
シナンジュ painting -5- update again
Got some more crucial parts finished so i could actually put together some sections.
Here is the result:

Thrusters with Mr Metal Color Dark Iron buffable paint. Looks great imo.

Backpack action

Upper body. How the yellow looks (brighter/darker) really depends on the lighting.
Also it seems like I'm not the only one who is making a yellow Sinanju. Sombody linked me to this one made by Gainjingunpla.
http://gaijingunpla.blogspot.com/2009/10/sinanju-build-project-review-and-theme.html
So make sure to check it out if you are interested.
That's it. Not too many parts left anymore.
Saturday, March 13, 2010
Sinanju painting -4- some parts finished
Over the past week or so, i managed to finish some parts of the Sinanju. The fit of some parts is rather tight, which can be a bit frustrating when paint scratches off and I have to redo things -_-
But what can you do eh? Stay frosty!


some more pics on the flickr.
Not sure if I have already mentioned it, but this thing has WAAAAY to many parts. Makes me miss masking (almost) :)
But what can you do eh? Stay frosty!


some more pics on the flickr.
Not sure if I have already mentioned it, but this thing has WAAAAY to many parts. Makes me miss masking (almost) :)
Sunday, March 7, 2010
Silicon-Tribe 1/90 Qubeley Finished!
Well, here it is. After a very long time i finally finished the Qubeley and took some photos too. Sure took longer than I'd have originally imagined :)


Comparison with my old MG Qubeley:

More pics here:
http://www.flickr.com/photos/40088241@N03/sets/72157623446927473/
The Silicon-Tribe resin kit is based on a Mamoru Nagano artwork who is also the artist behind the original AMX-004 Qubeley. This one is the MAN-103 Qubeley:

Overall I made more mistakes than I could count during building this kit, but I learned a lot and the end result turned out presentable I'd like to think.
This has definitely been the most fun kit I ever build and I regret nothing :)
Thanks go to Bawoo on the hobbyfanatics forum who created the Nagano logo decal for me and to everybody who left a comment during lengthy building process.
That's it.
Friday, March 5, 2010
Sinanju painting -3- Custom decals and sleeves
The decalset from samueldecal was a bit sparse, so I made some decals myself. Scanned the original decals from the Sinanju and traced the ones I needed in and filled in black.
Then printed them out on Laser decal paper. (cost like 2€ for an A4 sheet). Worked out great.

Below the decals I made (left) the samueldecal Sinanju set (bottom right) and a generic warning decal set in 1/144 from samuel - I prefer 1/144 decals on 1/100 kits, looks more to scale then man-sized warning decals that 1/100 ones are :)

For the sleeves I primed the plastic with black canned lacquer first, the sprayed Alclad2 Pale Gold over it.

Then I sprayed Revell flat black email color over it.

Then I wiped off the raised areas with lighter fluid and cotton buds. Worked out great but Alclad comes off easier than you'd think -_-
Have to redo a bunch of parts, but generally it works great.

Tuesday, March 2, 2010
Pics that don't suck - aka Jagd Doga - Quess part2
Tried to make pictures that don't totally suck and the Jagd Doga was the guinea pig. The lighting still leaves a lot to be desired but I have a pretty good idea how to make things better next time.


http://www.flickr.com/photos/40088241@N03/sets/72157623416584173/
*sold*


http://www.flickr.com/photos/40088241@N03/sets/72157623416584173/
*sold*
Monday, March 1, 2010
Sinanju painting -2-
As usual I used Tamiya acrylic paints for painting.
To paint the Sinanju yellow i primed the parts with cheapo Duplicolor canned primer, sprayed Mr. Hobby White Base over it and then Tamiya flat yellow. The white was so i get a more vibrant yellow. It works with directly spraying over the gray primer, but then it takes around 4 layers of yellow to get a good result. Over the flat yellow followed a clearcoat so that I can apply decals.

For the bazookas I used Tamiya Nato Black, which has a bit of a grayish tint... also i had that color left over :)
For the internals I am using Mr Metal Color Iron - buffable paint. After airbrushing you buff it a bit to get a great metal effect - which doesn't really photography that well.

As for the ornaments... my current plan is to paint the gold first (Alcald2 Pale Gold) and the spray email black over it. After it dries i wipe the raised gold parts free. Not sure if it will work, heh.
The sheer amount of parts is a bit annoying to paint, but at least, as mentioned before, the parts breakdown is good and most nubs parting-lines are hidden. So there aren't many putty sessions needed.
Subscribe to:
Posts (Atom)